Introduction to the GV–RML4005 Model
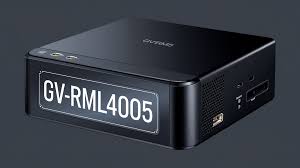
gv–rml4005
Are you ready to enhance your security setup with the impressive GV–RML4005 model? This cutting-edge camera is designed to protect your home or business, delivering high-quality video and reliable performance. Whether you’re a tech-savvy enthusiast or just starting out with surveillance systems, installing the GV–RML4005 can be straightforward and rewarding. With proper guidance, you’ll have this powerful device up and running in no time. Let’s dive into everything you’ll need for a seamless installation!
Required Tools and Materials
Before you begin installing the GV–RML4005 model, it’s essential to gather the necessary tools and materials. This preparation will make your installation process smooth and efficient.
Start with a drill and appropriate bits for mounting. You’ll need screws that can support the camera’s weight securely. A screwdriver is also crucial for tightening those screws properly.
Don’t forget about wiring tools. Wire strippers and electrical tape are key for connecting power sources safely. Having zip ties handy can help manage excess cable lengths neatly.
Ensure you have safety gear like gloves and goggles to protect yourself during installation. With everything in place, you’ll be ready to install your GV–RML4005 without any hitches!
Step-by-Step Installation Guide
Installing the GV–RML4005 model can seem daunting, but it’s straightforward with the right approach.
Start by preparing your installation area. Ensure it’s clean and clear of obstructions to allow for easy access.
Next, mount the bracket securely to a stable surface. Use appropriate screws and ensure it is level to avoid any misalignments.
Once the bracket is in place, attach the camera carefully. Align it according to your preference for optimal coverage.
After mounting, proceed with connecting wires. Make sure all connections are secure before plugging in to power up your device.
Check that everything functions correctly by testing your setup thoroughly. Each step plays a crucial role in ensuring the efficient performance of your GV–RML4005 model.
A. Preparing the Area for Installation
Before you dive into installing the GV–RML4005, taking a moment to prepare your installation area is crucial. Start by selecting the right location. Look for spots that provide optimal coverage while avoiding direct sunlight.
Clear the chosen area of any obstacles. This ensures an unobstructed view for your camera, allowing it to capture clear and accurate footage.
Next, check for nearby power sources and network connections if needed. Having these accessible will make wiring much more seamless later on.
Consider safety measures. Use a sturdy ladder or scaffolding when necessary to avoid accidents during installation. A little preparation can significantly enhance both efficiency and effectiveness in setting up your GV–RML4005 model.
B. Mounting the Bracket
Mounting the bracket is a crucial step in the installation of your GV–RML4005 model. Begin by selecting an ideal location that provides a clear view for monitoring without obstructions.
Use a pencil to mark where you will drill holes based on the bracket’s mounting template. Ensure these marks are level to avoid any misalignment later on.
Next, prepare your tools: a drill, appropriate-sized screws, and anchors if needed. Drill pilot holes carefully—this helps prevent damaging surfaces.
Position the bracket against the wall or surface and align it with your marked spots. Secure it tightly using screws while ensuring everything remains straight and stable.
Take a moment to double-check that all connections are secure before proceeding further in your installation process. This foundation ensures optimal performance for your camera setup down the line.
C. Installing the Camera on the Bracket
Now that the bracket is securely mounted, it’s time to install the camera. Start by carefully aligning the camera with the bracket. Ensure that all mounting holes are accessible.
Once aligned, gently slide the camera onto the bracket until you hear a click. This sound indicates a secure fit. Avoid using excessive force; this could damage either component.
Next, check for stability and adjust as needed. The angle should provide an optimal view without obstructions.
After positioning, use screws or fasteners included in your kit to secure the camera further if necessary. Make sure everything feels tight but not overly constricted.
A well-installed camera ensures better surveillance coverage and longevity of equipment performance. Take a moment to verify its position before moving on to electrical connections.
D. Connecting Wires and Power Source
Once the camera is securely mounted, it’s time to connect the wires and power source. Start by carefully identifying the corresponding cables from your GV–RML4005 model. Each wire serves a specific function, so take a moment to ensure you have everything in order.
Begin with the video cable. Connect this to your recording device or monitor for visual output. Make sure the connection is snug; loose connections can lead to poor image quality.
Next, turn your attention to the power source. Plug in your adapter or connect directly if you’re using hardwiring methods. Always double-check polarity when connecting DC power sources—getting this wrong could damage your equipment.
Secure all wiring neatly against walls or ceilings using clips or conduits as necessary. This not only keeps things organized but also protects them from wear and tear over time.
Troubleshooting Tips
If you’re facing issues with the GV–RML4005 model, there are a few quick checks you can perform. Start by ensuring that all connections are secure. Loose cables often lead to malfunctioning cameras.
Next, examine the power source. Make sure it’s functioning properly and providing adequate voltage. A faulty power supply can disrupt camera performance significantly.
Check for any obstructions in the camera’s view. Sometimes dirt or debris on the lens can affect image clarity and motion detection features.
Additionally, verify your software settings through the app or interface. Incorrect configurations may prevent full functionality of your device.
Consider resetting the model if problems persist. A factory reset can resolve many common issues and restore it to optimal performance levels without much hassle.
Maintenance and Care of the GV–RML4005 Model
Regular maintenance of the GV–RML4005 model is essential for optimal performance. Start by cleaning the camera lens periodically. Dust and grime can obscure images, so use a microfiber cloth to gently wipe it down.
Check connections frequently as well. Ensure that all wires are secure and free from wear or damage. A loose cable can lead to disconnections or poor image quality.
Software updates should not be overlooked either. Keep an eye on any firmware updates released by the manufacturer to enhance functionality and security features.
Inspect the mounting bracket regularly for stability. Environmental factors can affect its integrity over time, so make adjustments if needed to ensure your camera remains securely positioned.
Maintaining these aspects will help you enjoy uninterrupted service from your GV–RML4005 model while maximizing its lifespan.
Comparison with Other Models
When comparing the GV–RML4005 with other models, it’s essential to consider features and performance. The GV–RML4005 stands out due to its superior night vision capabilities. This makes it a prime choice for low-light environments.
Some competitors may offer higher resolution but often lack the reliability of this model. Users appreciate how the GV–RML4005 balances quality without compromising on cost-effectiveness.
Durability is another area where the GV–RML4005 excels. Many rival models struggle under harsh weather conditions, while this one is built to withstand various elements.
Installation ease sets it apart from others in its category. While some models come with complicated setups, users find the process straightforward and hassle-free with the GV–RML4005.
Conclusion
The GV–RML4005 model stands out for its reliability and advanced features. Installing it correctly is essential to maximize its performance and ensure your surveillance needs are met. By following the outlined steps, you can successfully set up this camera system with confidence.
Regular maintenance will keep your device functioning optimally while troubleshooting tips can help address any issues that arise. Additionally, understanding how the GV–RML4005 compares to other models allows you to appreciate its unique benefits.
With careful installation and upkeep, your GV–RML4005 will provide peace of mind through enhanced security monitoring for years to come.