Wired Titan submersibles are popular for their reliability, durability, and performance in underwater applications. Whether you’re using them for personal exploration, scientific research, or commercial purposes, proper installation is crucial to ensure they function optimally. This guide will walk you through the step-by-step process of installing a wired Titan submersible, ensuring a safe and efficient setup.
Understanding the Titan Submersible
What is a Titan Submersible?
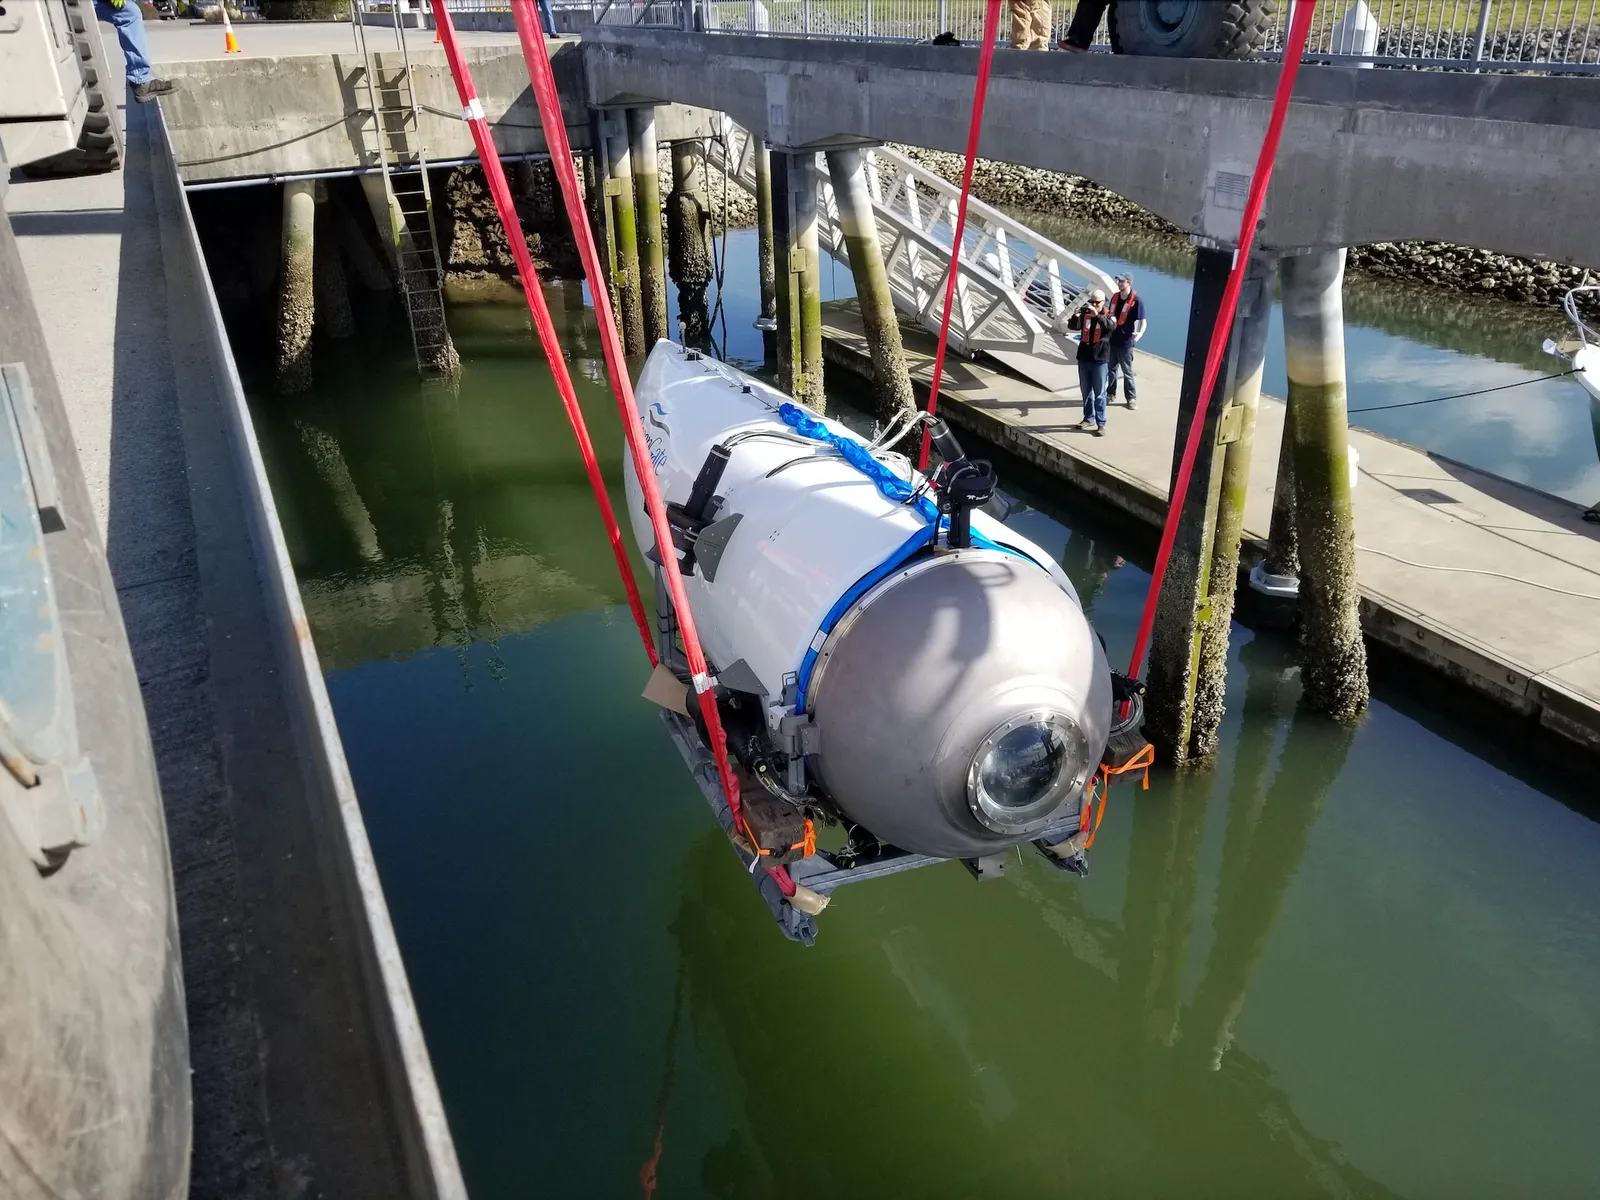
The Titan submersible is a robust underwater vehicle designed for deep-sea exploration and research. It is equipped with advanced sensors, high-definition cameras, and other necessary tools to navigate and record underwater environments. The submersible is wired, meaning it is connected to a surface vessel or platform through a cable, which provides power and transmits data.
Key Features of a Titan Submersible
- High-Pressure Resistance: Capable of operating at great depths.
- Advanced Navigation Systems: Includes sonar, GPS, and automated controls.
- Durability: Built with materials resistant to corrosion and pressure.
- Real-Time Data Transmission: Ensures continuous communication with the surface.
Preparing for Installation
Safety Precautions
Before beginning the installation, it’s crucial to adhere to safety protocols. Working with electrical components and heavy equipment in a marine environment presents several hazards.
- Wear appropriate protective gear, including gloves, safety glasses, and a helmet.
- Ensure all electrical components are grounded to prevent electrical shocks.
- Check the weather forecast, as rough seas can make the installation dangerous.
Gather the Necessary Tools and Materials
Ensure you have all the tools and materials required for the installation. These may include:
- Titan submersible unit
- Power supply cables
- Control console
- Mounting brackets and hardware
- Wrenches, screwdrivers, and pliers
- Electrical tape and cable ties
- User manual and installation guide
Site Assessment
Assess the installation site to ensure it is suitable for deploying the Titan submersible. Consider factors such as water depth, sea conditions, and the proximity of any underwater structures or hazards. The site should be clear of obstructions that could interfere with the submersible’s operation.
Step-by-Step Installation Guide
Step 1: Mounting the Control Console
The control console is the heart of the Titan submersible’s operation, housing all the controls and monitoring equipment.
- Position the Console: Choose a stable location on your vessel or platform for the control console. It should be easily accessible and within reach of power supplies.
- Secure the Console: Use mounting brackets and hardware to securely fasten the console in place. Ensure it is firmly attached to prevent movement during operation.
Step 2: Connecting the Power Supply
The Titan submersible requires a stable power supply to function correctly. The power is typically provided through a cable connected to the control console.
- Check Power Requirements: Refer to the user manual to determine the submersible’s power requirements.
- Connect Power Cables: Attach the power cables to the designated ports on the control console and the submersible. Ensure the connections are tight and secure.
- Test the Power Supply: Turn on the power to verify that the control console and submersible are receiving power. Check for any signs of electrical issues, such as sparks or overheating.
Step 3: Preparing the Cable
The cable connecting the Titan submersible to the control console is crucial for transmitting data and power.
- Inspect the Cable: Before deploying, inspect the cable for any signs of damage or wear. Any faults should be addressed immediately.
- Lay the Cable: Carefully unroll the cable from the spool, ensuring it does not tangle or kink. The cable should be laid out smoothly from the console to the deployment area.
- Secure the Cable: Use cable ties to secure the cable at regular intervals, preventing it from becoming loose or tangled during deployment.
Step 4: Attaching the Submersible
With the console and cable prepared, it’s time to attach the Titan submersible.
- Align the Submersible: Position the submersible near the deployment area, aligning it with the cable.
- Attach the Cable: Connect the cable to the submersible’s port. Double-check the connection to ensure it is secure and watertight.
- Check for Leaks: Before deployment, perform a dry run by powering up the submersible and checking for any leaks or malfunctions.
Step 5: Deployment
With everything in place, you can now deploy the Titan submersible into the water.
- Lower the Submersible: Slowly lower the submersible into the water using a winch or crane. Ensure it remains steady and avoid any sudden movements that could damage the equipment.
- Monitor the Descent: Use the control console to monitor the submersible’s descent, keeping an eye on depth readings and any obstacles.
- Test Controls: Once submerged, test the submersible’s controls to ensure everything is functioning correctly. Verify that the cameras, sensors, and navigation systems are operational.
Post-Installation Checklist
Running Diagnostic Tests
After installation, it’s essential to run a series of diagnostic tests to ensure the submersible is fully operational.
- Check all systems for any errors or malfunctions.
- Verify data transmission between the submersible and the control console.
- Test the emergency recovery system to ensure the submersible can be safely retrieved if necessary.
Routine Maintenance
Regular maintenance is crucial to prolong the life of your Titan submersible.
- Inspect the cable for wear and tear after each use.
- Clean the submersible to remove any salt or debris that could cause corrosion.
- Check all connections for tightness and integrity before each deployment.
Troubleshooting Common Issues
Power Loss
If the submersible loses power during operation, immediately bring it to the surface and inspect the power cable and connections.
Data Transmission Errors
Data transmission errors can often be resolved by checking the cable for kinks or damage and ensuring all connections are secure.
Mechanical Failures
Mechanical failures should be addressed by a qualified technician. Regular inspections can help prevent these issues.
Conclusion
Installing a wired Titan submersible requires careful planning, attention to detail, and adherence to safety protocols. By following this guide, you can ensure a successful installation and operation of your submersible, enabling you to explore the underwater world with confidence. Regular maintenance and troubleshooting will keep your equipment in top condition, allowing for continued use over time.