Eclipses are rare celestial events that offer an extraordinary opportunity for photographers, both amateur and professional, to capture breathtaking images. Whether it’s a solar or lunar eclipse, the excitement of documenting these events can be immense. With a total solar eclipse expected in 2024, now is the perfect time to prepare your gear and skills. This guide will help you take amazing eclipse pictures that you can cherish for a lifetime.
Understanding the Basics of Eclipse Photography
What Makes Eclipse Photography Unique?
Eclipse photography differs significantly from regular photography due to the unique lighting conditions and the rapid changes that occur during the event. The contrast between the darkened moon or sun and the bright corona or surroundings creates a visually stunning effect but also poses challenges. Understanding these differences is key to capturing the perfect shot.
Types of Eclipses to Photograph in 2024
In 2024, there are several notable eclipses to consider:
- Total Solar Eclipse (April 8, 2024): Visible across parts of North America, this eclipse is one of the most anticipated events of the year.
- Partial Lunar Eclipse (October 18-19, 2024): Though less dramatic than a total eclipse, this event will offer unique photographic opportunities as well.
Essential Equipment for Eclipse Photography
Choosing the Right Camera
For eclipse photography, a DSLR or mirrorless camera with manual settings is ideal. These cameras allow you to control exposure, focus, and aperture, all of which are crucial when shooting an eclipse.
- DSLR vs. Mirrorless: Both types of cameras can capture stunning eclipse photos, but mirrorless cameras tend to be lighter and more compact, which can be advantageous during a long shoot.
- Lens Selection: A telephoto lens with a focal length of at least 200mm is recommended to get close-up shots of the eclipse. For wider shots that capture the surrounding landscape, a lens with a shorter focal length will be suitable.
Essential Accessories
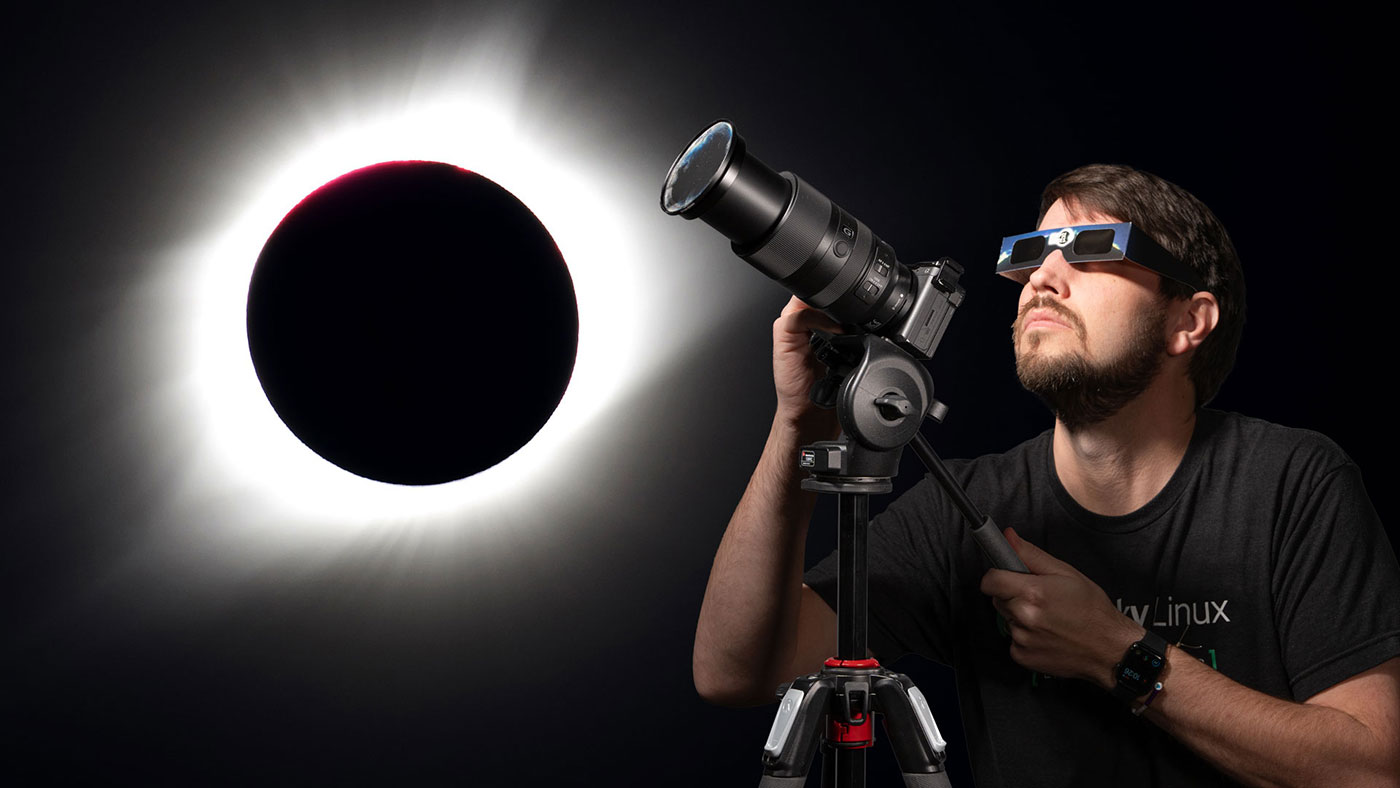
- Solar Filter: A solar filter is a must for photographing solar eclipses. It protects both your eyes and camera sensor from the intense sunlight. Make sure the filter fits securely on your lens.
- Tripod: A sturdy tripod is essential for keeping your camera steady during the long exposure times needed for eclipse photography.
- Remote Shutter Release: To avoid camera shake, use a remote shutter release or the camera’s built-in timer.
Planning and Preparation
Scout Your Location
Location is crucial when it comes to eclipse photography. The best spots are often those with clear, unobstructed views of the horizon. Check the path of the eclipse and choose a location that falls within the path of totality or maximum coverage.
- Check Weather Conditions: Cloud cover can ruin your eclipse photography plans. Monitor weather forecasts in the days leading up to the event and be prepared to travel to a different location if necessary.
- Arrive Early: Eclipses draw large crowds, so arrive at your chosen location early to secure a good spot.
Camera Settings for Eclipse Photography
Setting up your camera correctly is vital for capturing sharp, well-exposed images of the eclipse.
- ISO: Keep your ISO as low as possible (ISO 100 or 200) to reduce noise in your images.
- Aperture: A mid-range aperture (f/8 to f/11) is ideal for capturing sharp images with good depth of field.
- Shutter Speed: The shutter speed will vary depending on the phase of the eclipse. Start with a fast shutter speed (1/1000s) for the partial phases and adjust accordingly during totality.
- Manual Focus: Autofocus can struggle in low light conditions, so switch to manual focus and adjust it carefully for sharp images.
Techniques for Capturing Stunning Eclipse Images
Timing Your Shots
Timing is everything in eclipse photography. The event progresses through several phases, each offering different photographic opportunities.
- Partial Eclipse: During this phase, use a solar filter and capture the gradual covering of the sun or moon. Experiment with different exposures to capture the details of the event.
- Total Eclipse: This is the most dramatic phase, with the sun’s corona visible around the moon. Remove the solar filter during totality and adjust your exposure settings to capture the faint details of the corona.
- Diamond Ring Effect: Just before and after totality, the sun’s light creates a bright flash known as the “diamond ring effect.” This is a prime moment for a memorable shot.
Bracketing and HDR Photography
Bracketing is a technique where you take multiple shots at different exposures. This can be especially useful during an eclipse when lighting conditions change rapidly.
- HDR (High Dynamic Range): By combining multiple exposures, you can create an HDR image that captures the full range of light during the eclipse. This technique can highlight both the bright corona and the darker surroundings.
Composition Tips
Composition is key to creating an engaging eclipse photo. Consider including elements of the landscape, such as mountains or trees, to give a sense of scale and place.
- Rule of Thirds: Place the eclipse off-center in your frame to create a more dynamic composition.
- Foreground Interest: Including a silhouette in the foreground can add depth and interest to your eclipse photos.
Post-Processing Your Eclipse Images
Basic Adjustments
After capturing your images, post-processing can enhance their impact. Use software like Adobe Lightroom or Photoshop to adjust the exposure, contrast, and sharpness.
- Exposure: Fine-tune the exposure to bring out details in the corona or surrounding landscape.
- Contrast and Clarity: Increase contrast and clarity to make the eclipse stand out against the sky.
- Noise Reduction: If you shoot at a higher ISO, apply noise reduction to smooth out grainy areas of the image.
Advanced Techniques
For those comfortable with advanced editing, consider blending multiple exposures to create a composite image that showcases different phases of the eclipse in one frame.
- Panorama: If you captured wide-angle shots, stitch them together to create a panoramic image of the eclipse and its surroundings.
- Stacking: For lunar eclipses, stacking multiple images can enhance details and reduce noise, resulting in a sharper final image.
Conclusion
Photographing an eclipse is a rewarding experience that requires preparation, skill, and a bit of luck with the weather. By understanding the unique challenges of eclipse photography and following the techniques outlined in this guide, you can capture stunning images of the 2024 eclipses. Whether you’re a seasoned photographer or a beginner, the opportunity to document this rare celestial event is one you won’t want to miss. Happy shooting!